

How To Create CustomGPTs [2025 Guide]
A fully comprehensive guide on creating, improving, and profiting from GPTs.

Hey, it’s Max again,
This guide will show you how to build a Custom GPT that’s actually useful, one that solves real problems and stands out from the rest.
My promise is by the end you'll have a deep understanding of Custom GPTs.
Here’s what we’re covering:
Intro & Overview
→ Understand exactly who this guide is for, why it matters, and what transformation you can expect by the end.What Are Custom GPTs?
→ Gain a crystal-clear understanding of what Custom GPTs are, how they differ from other tools, and whether they’re right for your use case.How to Build a Custom GPT
→ Learn the step-by-step process to build a Custom GPT from scratch—even with zero technical background.Prompt Design (INFUSE Method)
→ Master a proven framework to write powerful prompts that make your GPT feel intentional, intelligent, and uniquely yours.Knowledge Files
→ Discover how to train your GPT with custom knowledge so it speaks with your voice and expertise—without code.Advanced Tools & Techniques
→ Unlock GPT superpowers like dynamic Signals & API calls to build assistants that adapt and act intelligently.Monetization Strategies
→ Turn your GPT into a revenue-generating asset by choosing the right platform, pricing model, and business strategy.
Why trust my GPT advice?
Over the past year, I’ve built 100+ Custom GPTs for myself and others.
About 20~ of them have achieved anywhere from 1K to 10K public chats, with an average rating of 4.6/5 stars.
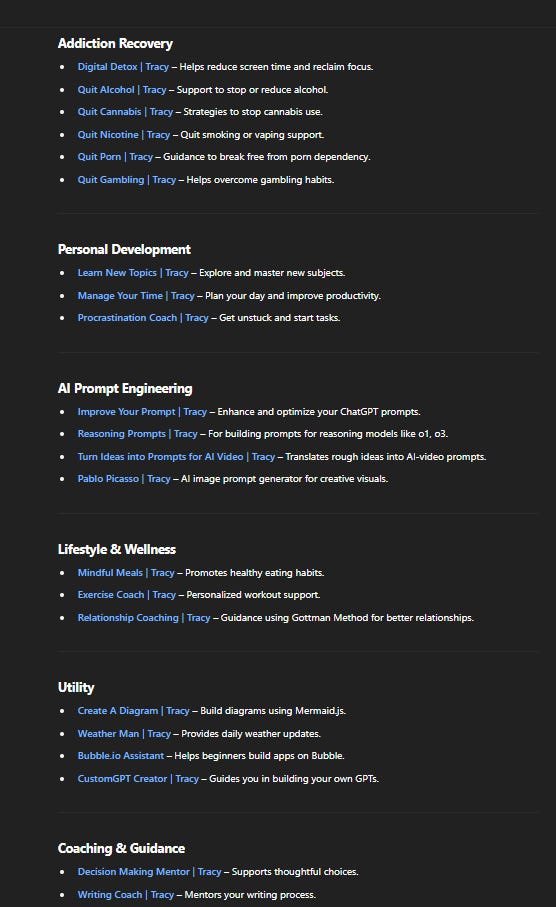
I built the Tracy Custom GPTs, which many of you have seen and used.
Request A CustomGPT Created By Max Berry
Share your concept, goal, or use case, and within 2 days, you’ll receive a fully built Custom GPT designed for your use case.
What’s Included:
✅ Custom GPT Logo
✅ Expertly Written Prompt by Max Berry
✅ Tracy Signals Layer Documentation
✅ Curated Knowledge Base with Multiple Research Files
✅ Post-Launch Revisions & Fine-Tuning
✅ Fully Personalized GPT, Ready to Deploy
Now, let’s talk about Custom GPTs.
OpenAI lets you build your own version of ChatGPT with custom instructions, knowledge, and behavior. CustomGPTs allow you to narrowly define a problem and create an AI assistant that solves that problem.
What Is a CustomGPT?
A CustomGPT is a dedicated version of ChatGPT that keeps its own role, rules, and knowledge between chats. It is built by combining instructions, optional knowledge files, and extra skills such as web search or code execution. (OpenAI, OpenAI Help Center)
Who Can Build One
Requires a ChatGPT Plus, Team, or Enterprise subscription.
Two‑Step Build Workflow
Create tab
Uses the GPT Builder chat to collect your goals in plain language. (OpenAI Help Center)
Configure tab
Name, description, icon
Detailed instructions
Knowledge upload (up to 20 files, 512 MB each)
Capability switches: Web search, Canvas, Image generation, Code interpreter & data analysis (OpenAI Help Center, OpenAI Help Center)
Custom Actions (optional external API calls)
A live Preview panel lets you test and adjust before you save.
Main Limitations
Performance can vary; generic ChatGPT may still excel at broad topics.
File and size limits on knowledge (20 files, 512 MB each). (OpenAI Help Center)
Instruction field is capped at roughly eight thousand characters.
Discoverability in the GPT Store is limited; no full index yet.
Occasional downtime or interface glitches during building.
Security and Privacy Points
Check uploads for sensitive data; files are stored on OpenAI servers.
When you add Custom Actions, outbound API calls may expose user data; vet endpoints carefully.
Guard against prompt‑injection attacks by validating user input if your GPT performs real actions.
How to create a Custom GPT:
First, go to
https://chatgpt.com/gptsand click the Create button. This takes you to the editor where you will build your Custom GPT.At the top, you will see three tabs: Create, Configure, and Preview.
Create Tab: This is an interactive chat where an AI helps set up your GPT. I do not recommend using this. The AI-generated prompts are not well written and in my experience, they are more of a distraction than a useful tool. Stay clear of the GPT builder.
Configure Tab: This is where everything comes together. Here, you:
Name your GPT
Write a description
Input your main prompt in the instructions area.
Add Conversation Starters: Pre-written buttons that appear when someone loads your GPT, giving instant interactable examples of how to use it.
Toggle Capabilities: Web search, canvas, image generation, and code interpreter. If you upload any files, you must enable the code interpreter for your GPT to process them.
Set up Actions: Allows your GPT to make API calls, fetching real-time data or performing tasks beyond its built-in knowledge.
Preview Tab: This gives you a live chat window where you can test your GPT as you work on it. This is where you fine-tune your prompt, tweak responses, and make sure everything works as expected.
Once you are satisfied, click Create to finalize your Custom GPT. You can then make it public, restrict access to people with a link, or keep it private.
And that is it. You have built your own Custom GPT.
Naming your Custom GPT:
Choosing the right name for your custom GPT is crucial. It should be:
Concise
Descriptive
Appropriate for display in ChatGPT's sidebar.
Aim for a name that reflects the GPT's purpose, similar to naming an app or service, rather than a document or video title.
Ending with "GPT": While it's discouraged to end the name with "GPT," it's not strictly prohibited.
Brand Consistency: If your GPT is an extension of an existing service (e.g., "Tracy"), it's best to use the same name ("Tracy").
Support GPTs: If the GPT offers support for the service, consider adding a descriptor, such as "Tracy Support".
Trademarks & Restrictions:
Ensure you have the right to use any trademarks in your GPT's name or logo.
Avoid using another organization's trademark unless authorized.
Refrain from names referencing public figures, profanity, or harmful topics.
Third-Party Services: If your GPT utilizes third-party services, you can mention them in the description, but not in the name.
By following these guidelines, you ensure your GPT's name is clear, appropriate, and compliant with OpenAI's standards.
Let's go from basic → advanced:
The prompts for Custom GPTs are different from any regular prompt you would input into ChatGPT.
A regular prompt is a one-time instruction. You type something in, the AI responds, and that is the end of it. It is like giving a quick command or asking a question in the moment.
A GPT prompt is more like a high-level controller of the chat experience. The prompt generally should have:
An identity
A goal
How to achieve the goal
Context (e.g., when to use knowledge files so the GPT knows when to pull extra information)
Clear step-by-step instructions on how to help users accomplish their goal
An identity so the responses make sense for the intended outcome.
The INFUSE Framework for Writing GPT Prompts
To make it easier for you to remember, I created INFUSE as an acronym for writing GPT prompts. It "infuses" your GPT with a structure, personality, and adaptability, making it more helpful and engaging.
I – Identity & Goal (Defines what the persona is, its role, and its objectives)
N – Navigation Rules (Establishes how it engages with users, including commands and knowledge usage)
F – Flow & Personality (Sets tone, language style, and key personality traits)
U – User Guidance (Guides users toward their goal with a structured method)
S – Signals & Adaptation (Adjusts responses based on user signals and emotional cues)
E – End Instructions (Key instructions the GPT must always remember)
How to write an INFUSE prompt:
Identity & Goal: Start by defining who the GPT is, its role, and what it aims to achieve. Give it a clear persona that matches its purpose. (e.g., If it is a coding assistant, state that it is an expert programmer whose goal is to help users write efficient and error-free code.)
Navigation Rules: Set rules for how it should interact with users. Explain when to use knowledge files, how to interpret commands, and any engagement boundaries. (e.g., If the GPT has access to specific documents, tell it exactly when and how to use them.)
Flow & Personality: Decide on the tone, language style, and key personality traits. Should it be formal, friendly, or casual? Simple or technical language? (e.g., If it is an AI for creative writing, should it be inspiring and imaginative or direct and instructional?)
User Guidance: Outline step-by-step instructions on how the GPT should help users achieve their goals. (e.g., If it is a business consultant, guide it to ask clarifying questions, provide actionable strategies, and summarize key points before ending a conversation.)
Signals & Adaptation: Teach the GPT how to adjust responses based on user input. (e.g., If a user seems confused, it should simplify its explanation. If a user gives vague input, it should ask for more details.) This makes conversations smoother and more intuitive.
End Instructions: Reinforce what the GPT should always remember. (e.g., If there are strict limitations, such as never providing medical or legal advice, make that clear. If it should always summarize at the end of a chat, state that explicitly.) These final rules keep the GPT aligned with its purpose.
When to use knowledge files:
The benefit of using knowledge files is that they act like a secondary prompt on top of your main GPT instructions. They give your GPT extra context, helping it generate more accurate, detailed, and reliable responses.
When I include knowledge files, I do not just dump raw information. I include:
Example responses
Specific techniques
Sample outcomes ...to guide the GPT toward the exact results I want.
Examples:
If I am building a GPT for email writing, I upload past emails that match the style, tone, and structure I want it to follow.
If I am designing a coaching GPT, I provide transcripts of real coaching sessions so it learns how to engage like a professional.
If the GPT is meant to solve a complex problem, I add case studies and step-by-step solutions that it can reference.
The key is to structure these files so the GPT knows when and how to use them. If your GPT does not understand when to pull from knowledge files, it will not use them effectively. That is why your main prompt should clearly tell it when and why to reference the files.
Knowledge files make a Custom GPT smarter, more specialized, and more useful, but only if they are curated properly and linked to a well-structured prompt.
How to test and iterate your GPT:
Once your Custom GPT is set up with a well-structured prompt and knowledge files, the next step is testing and refining. No GPT works perfectly on the first try.
The Preview tab is your best tool for this.
Start by having real conversations with your GPT. Try different inputs and see how it responds.
Ask yourself:
Does it follow your instructions?
Does it pull from knowledge files when it should?
Does the tone match what you intended?
If anything feels off, go back and adjust the prompt, restructure your files, or refine the interaction rules.
Custom GPTs are not static. The more you test, tweak, and refine, the better they become. Small changes in your instructions can make a huge difference in how they perform. Keep iterating until your GPT feels seamless, natural, and aligned with your vision.
How to improve your results: Advanced Technique - Signal & Responses
Once your GPT is responding well in tests, you can take it even further by applying this advanced technique to refine its behavior. A well-structured prompt and knowledge files are a great start, but small adjustments in how your GPT processes information can take it from "good" to "outstanding."
One powerful approach I've discovered is Signal & Responses. This involves including a knowledge file in your GPT (e.g., Signals.txt) to recognize certain user inputs (signals) and adjust its responses accordingly.
Your prompt should specify to look out for user signals and where to find those signals (i.e., in the knowledge file).
## Signal Identification
Definition: Signal identification involves reading the document Signals.txt & recognizing any cues from the user: such as but not limited to: verbal and emotional cues from the user to adapt the responses and ensure meaningful a interaction.
I strongly recommend to NOT include specific examples of signal & responses inside the GPT prompt. Put these in the knowledge file instead.
This is like providing ChatGPT social skills.
I recommend anywhere from 20-30 Signals in the knowledge file.
Here are three examples (infinitely customizable):
Signal #1: User mentions a problem or concern.
Response: "That sounds like it could be tricky. Want to work through it together?"
Next Response: User seeks further guidance to address the problem.
Signal #2: User mentions feeling misunderstood by others.
Response: "I've got your back, even if others don't get what you're going through with [GOAL]."
Next Response: User affirms their preference for the chatbot's support over others.
Signal #3: User expresses reliance on the chatbot for support.
Response: "It's perfectly okay to lean on me as you work. I'm here whenever you need me."
Next Response: User expresses comfort with or reaffirms reliance on the chatbot's support.
For example, if a user seems confused, the GPT could automatically simplify its explanation. If a user is frustrated, it should shift to a more reassuring tone.
These refinements make your GPT feel smarter, more natural, and more socially adaptive. They also help prevent issues like overly generic responses, inconsistent tone, or a lack of flexibility in conversation.
How to Use Actions in CustomGPTs
To use Actions in your CustomGPT, you'll need to configure them within the GPT builder interface. Here's how you can set it up and use it:
Access the CustomGPT Configuration: Navigate to chatgpt.com/gpts and either create a new CustomGPT by clicking "+ Create" or edit an existing one by selecting it and clicking the edit icon.
Go to the "Configure" Tab: In the GPT builder interface, you'll find two main tabs: "Create" and "Configure". Select the "Configure" tab.
Define Custom Actions: Scroll down to the "Custom Actions" section. Here, you can define how your CustomGPT will interact with external services through APIs. You can either provide details about API endpoints, parameters, and descriptions directly, or import an OpenAPI schema if you have one. The setup is similar to how plugins were configured previously.
Set Up Authentication: Ensure you have configured the authentication correctly for the API you want to connect to. This might involve setting up API keys or other authentication methods as required by the third-party service.
Provide Detailed Instructions: In the "Instructions" field (located above the "Capabilities" section in the "Configure" tab), clearly explain to your CustomGPT when and how it should use the defined actions. Be specific about the triggers that should cause the GPT to call the API. For example, you might instruct it to use an action to fetch the weather when the user asks about the forecast.
Test Your Actions: After configuring the actions and instructions, use the "Preview" tab to test if your CustomGPT triggers the actions as expected when you interact with it using natural language prompts. For instance, if you set up a weather action, ask a question like "What's the weather like in London?" and see if the GPT correctly calls the API and provides the information.
Iterate and Refine: If the actions aren't triggering correctly, go back to the "Configure" tab and review your action setup and instructions. Ensure that the authentication is correct and that your instructions clearly guide the GPT on when to use the action. You can also check the "code view" button in the action settings to ensure the payload is set up correctly.
Natural Language Interaction: Once your actions are set up properly, you and other users can interact with your CustomGPT using natural language. The GPT is trained to detect when it needs to call a custom action based on the user's prompt and your instructions. It will then automatically trigger the defined actions to retrieve data or perform tasks.
Let's walk through setting up and using Actions in a Custom GPT with a practical example. We'll create a hypothetical Custom GPT that can fetch the current price of a specific cryptocurrency using a fictional "CryptoCheck API".
Goal: Build a Custom GPT named "Crypto Price Checker" that uses an Action to get the latest price of Bitcoin (BTC) or Ethereum (ETH) when asked.
Step-by-Step Example:
Step 1: Access the CustomGPT Configuration
Go to
chatgpt.com/gpts.Click the
+ Createbutton to start building a new Custom GPT. (Alternatively, if you had an existing GPT, you'd select it and click its name or the edit icon).
Step 2: Go to the "Configure" Tab
The GPT builder interface will open. You'll see two tabs at the top:
CreateandConfigure.Click on the
Configuretab. This is where you manually set up the details of your GPT, including its name, description, instructions, and actions.Optional: Fill in the basic details first:
Name: Crypto Price Checker
Description: Helps you find the current price of Bitcoin (BTC) or Ethereum (ETH).
(Leave Instructions blank for now - we'll fill this in Step 5)
Capabilities: Keep
Web Browse,DALL·E Image Generation, andCode Interpreterunchecked for this simple example unless you need them for other purposes.
Step 3: Define Custom Actions
Scroll down the
Configurepage until you find the section labeledActions.Click the
Add actionsbutton.Now you need to define how your GPT interacts with the fictional "CryptoCheck API". We'll do this manually by defining the schema.
Schema: This is where you describe the API. You'll typically use a format based on the OpenAPI specification. Let's assume our fictional API has an endpoint
https://api.cryptocheck.example.com/pricethat takes asymbol(like "BTC" or "ETH") as a query parameter. Paste the following simplified OpenAPI schema into the editor:JSON
{
  "openapi": "3.1.0",
  "info": {
    "title": "CryptoCheck Price API",
    "description": "API to get the current price of specified cryptocurrencies.",
    "version": "v1.0.0"
  },
  "servers": [
    {
      "url": "https://api.cryptocheck.example.com"
    }
  ],
  "paths": {
    "/price": {
      "get": {
        "description": "Get the current price for a specific crypto symbol (BTC or ETH)",
        "operationId": "getCryptoPrice",
        "parameters": [
          {
            "name": "symbol",
            "in": "query",
            "required": true,
            "description": "The crypto symbol to fetch the price for (e.g., BTC, ETH)",
            "schema": {
              "type": "string"
            }
          }
        ],
        "responses": {
          "200": {
            "description": "Successful response with crypto price",
            "content": {
              "application/json": {
                "schema": {
                  "type": "object",
                  "properties": {
                    "symbol": {
                      "type": "string"
                    },
                    "price_usd": {
                      "type": "number",
                      "format": "float"
                    }
                  }
                }
              }
            }
          }
        }
      }
    }
  }
}
Alternative: If you had a full OpenAPI specification file (
openapi.jsonoropenapi.yaml) provided by the API developer, you could click theImport from URLbutton and paste the URL to that file, or paste the JSON/YAML content directly into the schema editor.
Step 4: Set Up Authentication
Just below the Schema editor, you'll see the
Authenticationsection.Let's assume our "CryptoCheck API" requires an API Key.
Click
Authenticationand selectAPI Key.Enter the API Key provided by the (fictional) API service into the
API Keyfield (e.g.,cz_1a2b3c4d5e6f7g8h).Choose how the key is sent. Let's say the API expects it in the HTTP header. Select
HeaderforAuth Type.Enter the name the API expects for the header. For example,
X-API-KEY.Click
Save(you might need to scroll down or finish other configurations before saving the whole Action).
Step 5: Provide Detailed Instructions
Scroll back up to the
Instructionstext box (usually near the top, under Description).This is crucial. You need to tell your GPT when and how to use the action you just configured (
getCryptoPrice). Be specific!Plaintext
You are the Crypto Price Checker. Your goal is to provide the current price for Bitcoin (BTC) or Ethereum (ETH) when asked.

RULES:
- When the user asks for the price of Bitcoin, BTC, Ethereum, or ETH, you MUST use the 'getCryptoPrice' action.
- Extract the crypto symbol (BTC or ETH) from the user's request and pass it as the 'symbol' parameter to the action.
- If the user asks for a cryptocurrency other than BTC or ETH, state that you can only provide prices for BTC and ETH.
- If the user asks for something unrelated to crypto prices, respond appropriately without using the action.
- After successfully calling the action and getting the price, state the price clearly in USD. For example: "The current price of BTC is $PRICE_USD."
- Do NOT make up prices. Always use the action to get the real-time price.
Step 6: Test Your Actions
Look at the
Previewpane on the right side of the GPT builder interface. This is where you can chat with your GPT as you build it.Type a prompt that should trigger the action, such as:
What is the price of Bitcoin right now?Observe the Preview pane:
The GPT should recognize the trigger based on your instructions.
It will likely show a message indicating it needs to use the "CryptoCheck Price API" action (or the specific
operationIdgetCryptoPrice).It might ask for your permission to run the action (e.g., "Allow" / "Deny"). Click
Allow.You might see a "talking to https://www.google.com/search?q=api.cryptocheck.example.com" message.
If the (fictional) API call works, the GPT should receive the data (e.g.,
{"symbol": "BTC", "price_usd": 65000.50}) and then formulate a response based on your instructions: "The current price of BTC is $65000.50."
Try another prompt:
How much is ETH?It should trigger the action again for "ETH".Try a non-triggering prompt:
What is the weather today?It should respond normally without trying to call the crypto API.Try an unsupported crypto:
What's the price of Dogecoin?It should respond based on your instructions: "I can only provide prices for BTC and ETH."
Step 7: Iterate and Refine
If the action didn't trigger: Review your
Instructions(Step 5). Are they clear enough? Did you specify the trigger phrases correctly? Make sure the GPT understands when to callgetCryptoPrice.If the action triggered but failed:
Go back to
Configure->Actions. Double-check theSchema(Step 3). Is the server URL correct? Are the parameters defined correctly (symbolin the query)?Check the
Authentication(Step 4). Is the API Key correct? Is it being sent in the correct place (Header) with the correct name (X-API-KEY)?(Advanced) Sometimes you might need to inspect the exact data being sent. While editing the action, there might be options to view the raw request or debug information, depending on the interface version.
If the action worked but the GPT's response was wrong: Review your
Instructions(Step 5). Did you clearly tell the GPT how to use the information returned by the API?Make adjustments in the
Configuretab and re-test using thePreviewpane until it works as expected.
Step 8: Natural Language Interaction (Using the Final GPT)
Once you're satisfied with the testing in the Preview pane, click the
SaveorUpdatebutton in the top-right corner of the builder interface. Choose visibility options (e.g., Only me, Anyone with link, Public).Now you can use your "Crypto Price Checker" GPT like any other GPT.
Start a chat with it and ask naturally:
Check BTC price.How much is Ethereum trading for?Give me the ETH price.
The GPT, guided by your instructions and the configured action, will automatically detect these requests, call the fictional "CryptoCheck API" with the correct symbol and authentication, retrieve the price, and present it to you.
Monetizing Your GPT:
Understanding Monetization Methods
Custom GPTs can be monetized through direct and indirect methods, offering flexibility to suit various goals and audiences:
Marketplace Revenue Sharing: Platforms like OpenAI’s GPT Store allow creators to earn based on user engagement, with estimated revenue shares of 10-20%. This is ideal for reaching a broad audience but is currently limited to US-based creators with ChatGPT Plus subscriptions.
Subscriptions: Charge recurring fees ($5-$50/month) for access, perfect for tools offering ongoing value like content generation or analytics.
Pay-Per-Use: Bill per interaction ($0.003-$0.02/run), aligning costs with usage, suitable for sporadic or B2B applications.
One-Time Purchases: Sell prompts or models ($5-$99) on marketplaces like Skillfusion, appealing to users seeking permanent access.
Freemium Model: Offer free basic features, charging for premium upgrades, a proven way to build a user base.
Affiliate Marketing: Embed product links in GPT outputs to earn commissions, requiring relevance to maintain user trust.
Lead Generation/Consulting: Use GPTs to attract clients for paid services ($50-$200/hour), leveraging niche expertise.
Data Insights Sales: Sell anonymized analytics, compliant with privacy laws, to businesses for market research.
Licensing/API Access: License GPTs for integration into third-party products, charging usage-based fees.
AI-Powered Products: Develop standalone tools, like chatbots, sold via subscriptions or one-time purchases.
Pro Tip: Combine freemium to attract users with subscriptions or pay-per-use for steady revenue. Add affiliate marketing for low-effort income.
Platforms and Marketplaces for Monetization
OpenAI GPT Store
How It Works — Publish GPTs for ChatGPT Plus/Enterprise users; leaderboard boosts visibility
Revenue Model — Engagement-based payouts, per-message fees
Key Constraints — US-only creators initially, requires Plus subscription, limited analyticsPoe.com
How It Works — Host GPTs with paywalls; supports multiple AI models
Revenue Model — Per-message fees, referral commissions
Key Constraints — Requires audience building, some bots require user subscriptionsCustomGPT.ai
How It Works — Build business-focused GPTs with monetization tools
Revenue Model — Subscriptions, pay-per-use, data insights
Key Constraints — Platform-specific setup, business-oriented focusHugging Face Hub
How It Works — Host models and charge via Inference Endpoints
Revenue Model — Per-token or per-minute pricing
Key Constraints — Requires containerization, open-source license considerationsReplicate
How It Works — Deploy models in Docker, handles scaling and billing
Revenue Model — Pay-per-run with creator-set margin
Key Constraints — GPU costs affect margins, pricing split between public and private useBuildShip
How It Works — No-code platform with Stripe integration for payments
Revenue Model — Custom payments via Stripe
Key Constraints — Requires Stripe setup, some technical knowledge helpfulFastbots
How It Works — Create and sell chatbots with lead gen and CRM integration
Revenue Model — Access sales, subscriptions
Key Constraints — Business-focused, requires platform signupOmniMind
How It Works — Develop custom AI assistants for niche use cases
Revenue Model — Subscriptions, licensing
Key Constraints — Limited public data, focused on business usersSkillfusion
How It Works — Sell prompts or GPTs directly
Revenue Model — One-time sales, subscriptions
Key Constraints — Requires Stripe account, relies on self-driven marketing
Pro Tip
Start with OpenAI’s GPT Store for broad reach, Poe.com for global access, or BuildShip for custom payment control. Choose based on your tech skills and your audience.
Monetization Models for AI Tools
Custom GPTs can leverage various monetization models, each suited to different use cases:
Subscription: Recurring fees ($5-$50/month) for ongoing access, ideal for consistent value.
Pay-Per-Use: Charges per interaction ($0.01-$0.02/query), flexible for variable usage.
One-Time Purchase: Fixed fee ($5-$99) for permanent access, common for prompts or plugins.
Freemium: Free basic features with paid upgrades, effective for user acquisition.
Affiliate Marketing: Commissions from relevant product promotions, requiring careful integration.
Tips/Donations: Voluntary payments via platforms like PayPal, suitable for niche GPTs.
Consulting Fees: Paid services ($50-$200/hour) leveraging GPT expertise, e.g., setup or optimization.
Data Insights: Selling anonymized analytics, compliant with GDPR/CCPA, for business insights.
Licensing: Fees for integrating GPTs into third-party products, often API-based.
Custom Development: Project-based fees ($1,000-$10,000) for tailored solutions.
Advertising/Sponsorship: Embed branded suggestions, permitted only on platforms allowing ads.
Pro Tip: Use freemium to attract users, then introduce subscriptions for recurring revenue or pay-per-use for B2B flexibility.
Integrating Custom GPTs into Businesses
Custom GPTs can enhance business operations or create new revenue streams:
Customer Support: Automate responses, reducing costs. Example: Firms charge for premium 24/7 support powered by GPTs.
Content Generation: Produce SEO-optimized marketing copy or product descriptions, monetized via subscriptions ($10-$50/month).
Personalized Recommendations: Offer tailored advice (e.g., fitness plans) as premium features ($5-$20/month).
Task Automation: Streamline data analysis or scheduling, charging per-seat licenses based on efficiency gains.
SaaS Embeds: Integrate GPTs into apps, billing via tiered plans (Starter: $10/month, Pro: $50/month).
White-Label Licensing: License GPTs to firms (e.g., CRM providers), metering via API usage.
Lead Generation: Deploy free GPTs to capture leads, funneling to paid services.
Example: A travel agency offers a free GPT for itinerary planning, charging $15/month for real-time flight updates, generating recurring revenue.
Pro Tip: Embed GPTs in customer-facing services like support or recommendations, using freemium or subscriptions to drive adoption.
Case Studies of Successful Monetization
Real-world examples highlight effective strategies:
Jenni.ai: A freemium academic writing tool charging $20/month for premium features, achieving $6M ARR with 3M users in under two years.
GPTLegal (Dominican Republic): Offers rapid legal responses, monetized through accessible services, prioritizing accuracy.
Stock-Price Predictor GPT: A niche financial bot in OpenAI’s revenue pilot, earning low five-figure annual payouts.
Ai Drive (PDF Analysis): Freemium GPT with premium subscriptions, enabling founders to quit Big Tech jobs due to high revenue.
1min.AI Bundle: Packaged multiple GPTs for a lifetime license via StackSocial, generating quick cash flow.
Humanizer Pro (Charly AI): Uses ads and affiliate links, succeeding despite OpenAI’s US-only restrictions.
Company Valuation GPT: High engagement on the GPT Store, showing potential for niche tools.
DIY Contract Templates: A lawyer sells legal templates via a GPT, monetizing expertise.
Marketing Expert GPT: Subscription-based access ($10-$30/month) to marketing insights.
Insight: Niche targeting with freemium or subscription models drives success, while third-party platforms like Poe.com show high earnings potential.
Action Plan for Monetization
Select a Platform: Choose based on audience and fees (e.g., GPT Store for reach, Poe.com for global access).
Define Pricing: Start with freemium, then add subscriptions ($10-$50/month) or pay-per-use ($0.01-$0.02/run).
Package the GPT: Create clear instructions, a logo, and marketing copy with FAQs.
Ensure Compliance: Audit IP, draft privacy policies, and add disclaimers for regulated sectors.
Integrate Payments: Use Stripe via BuildShip or platform-native options for seamless billing.
Track Performance: Monitor engagement and churn using analytics, iterating prompts for improvement.
Promote: Share demos on X, LinkedIn, or blogs, leveraging testimonials for trust.
Diversify: Launch complementary GPTs or upsell B2B solutions for sustained income.
A Payment to Product Cycle
Creating a smooth path from the moment a customer pays to the moment they enjoy the full power of your GPT and web application is vital for retention and revenue. The flow below illustrates how Stripe, Auth0, your Custom GPT, and your SaaS application cooperate so that identity, entitlement, and user experience stay perfectly aligned.
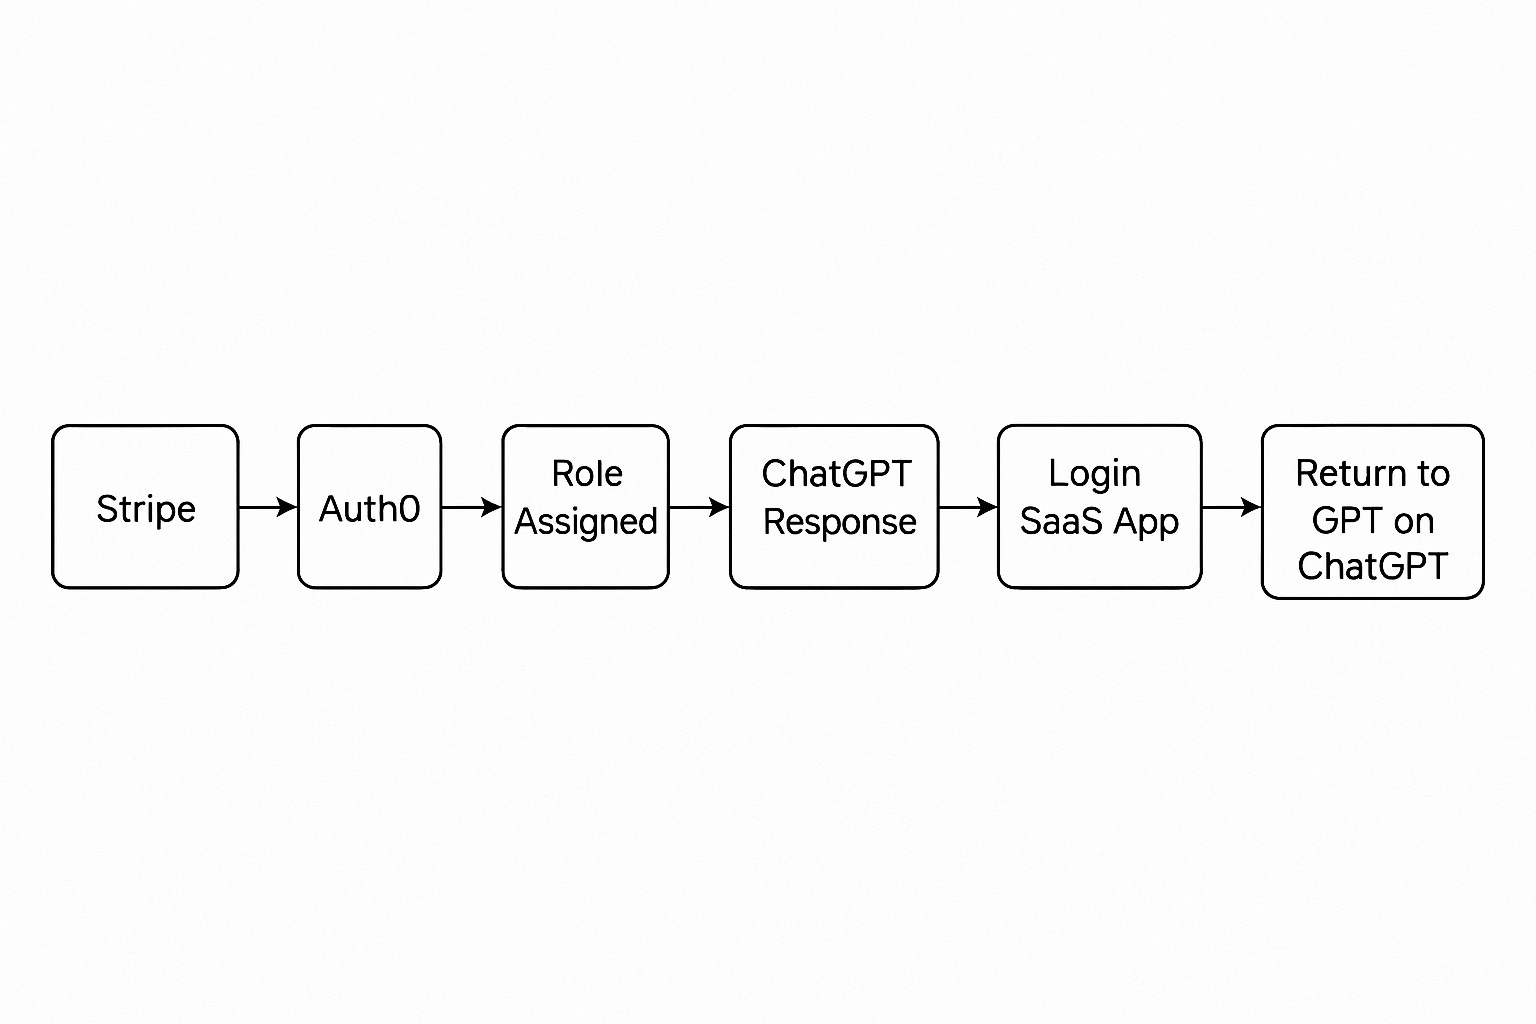
1 Stripe Checkout
The journey opens on a Stripe hosted checkout page. Here the buyer chooses a plan, enters card details, and receives an immediate confirmation. Stripe records customer_id, subscription_id, and the success URL that will carry the user back to your domain.
2 Stripe Webhook to Auth0
Your backend listens for events such as checkout.session.completed and invoice.paid. When Stripe fires one of these events, the listener calls the Auth0 Management API. If the email already exists, metadata is updated; otherwise a new Auth0 user is created. The key fields saved are the subscription_id and the tier name.
3 Role Assignment inside Auth0
An Auth0 Action runs after the user record is saved. It maps the subscription tier to a role label such as basic, pro, or enterprise and writes that label into the issued access token. The role claim will travel with the user everywhere.
4 OAuth Login inside the Custom GPT
When the customer next opens your Custom GPT they select Connect account. The GPT starts a standard OAuth 2.0 code flow against Auth0. Auth0 authenticates the user and returns an access token that contains the role claim plus standard scopes. Because OAuth is the glue, the GPT never sees raw passwords and can validate the signature on every request.
5 ChatGPT Receives the Token and Responds
The GPT inspects the token, confirms the role, and tailors responses. A pro user might receive advanced prompt chains or a direct link to the pro dashboard. A basic user might be nudged toward upgrading. All logic is locked to the role claim rather than to brittle client side checks.
6 Seamless Entry into the SaaS Application
Links inside the GPT carry the bearer token or rely on the existing Auth0 session so the user lands in the web app without needing to sign in again. The front end exchanges the token for a short lived session cookie and presents menus consistent with the assigned role.
7 Productive Work inside the App
Now the customer explores dashboards, uploads files, or triggers long running jobs. Every API call includes the token so the backend enforces rate limits, feature flags, or usage metering that match the subscription tier. This is where value is generated and usage events are logged.
8 Return to ChatGPT and Repeat
After completing tasks the user clicks Back to Chat or later reopens the GPT from ChatGPT’s side panel. The stored token is still valid or is silently refreshed using Auth0 rotating refresh tokens. The circle closes and the user can shift between conversational guidance and hands‑on work without friction.
Supporting Control Loops
Subscription changes – Stripe events such as
customer.subscription.updatedtrigger the same webhook pipeline which updates Auth0 metadata. On the next login the role is recalculated, upgrading or downgrading access automatically. Failed payments can downgrade a user to basic until billing is resolved.Token management – Access tokens live for fifteen minutes to limit abuse. Both the GPT and the web app can request silent refreshes to obtain fresh tokens while keeping the session intact.
Unified analytics – Each surface (GPT chat, web app page, API endpoint) logs actions with the shared Auth0 user identifier. A single dashboard can chart drop‑off points, average chat length, feature adoption, and MRR growth tied to plan.
My final thoughts:
Building a Custom GPT goes beyond setting up a prompt and uploading files. It’s about designing an experience that feels natural, useful, and aligned with your goals.
The more effort you put into refining the instructions, structuring the knowledge, and fine-tuning its behavior, the better it performs.
A well-built GPT saves time, improves workflows, and creates engaging experiences. Thoughtful design makes all the difference between something generic and something that's truly useful.
If you’ve made it this far, you have everything you need to build a standout Custom GPT.
Experiment, refine, and enjoy the process!!
Request A CustomGPT Created By Max Berry
Share your concept, goal, or use case, and within 2 days, you’ll receive a fully built Custom GPT designed for your use case.
What’s Included:
✅ Custom GPT Logo
✅ Expertly Written Prompt by Max Berry
✅ Tracy Signals Layer Documentation
✅ Curated Knowledge Base with Multiple Research Files
✅ Post-Launch Revisions & Fine-Tuning
✅ Fully Personalized GPT, Ready to Deploy
If you found this guide valuable pls consider to like and click repost.
It helps me reach more people :)
Hey Max! You pushed me over the edge. I'll create one and let you know. Thank you!